Using the Signal Library
Last updated: September 15, 2026
The Signal Library is where you choose the activity Vector should monitor across your accounts.
Signals capture evidence from sources like research activity, your CRM, marketing automation, LinkedIn, website behavior, job changes, and company events. Vector uses that activity across experiences like account prioritization, buying stages, account journeys, and activation.
Open the Signal Library
From the left navigation, select Signal Library.
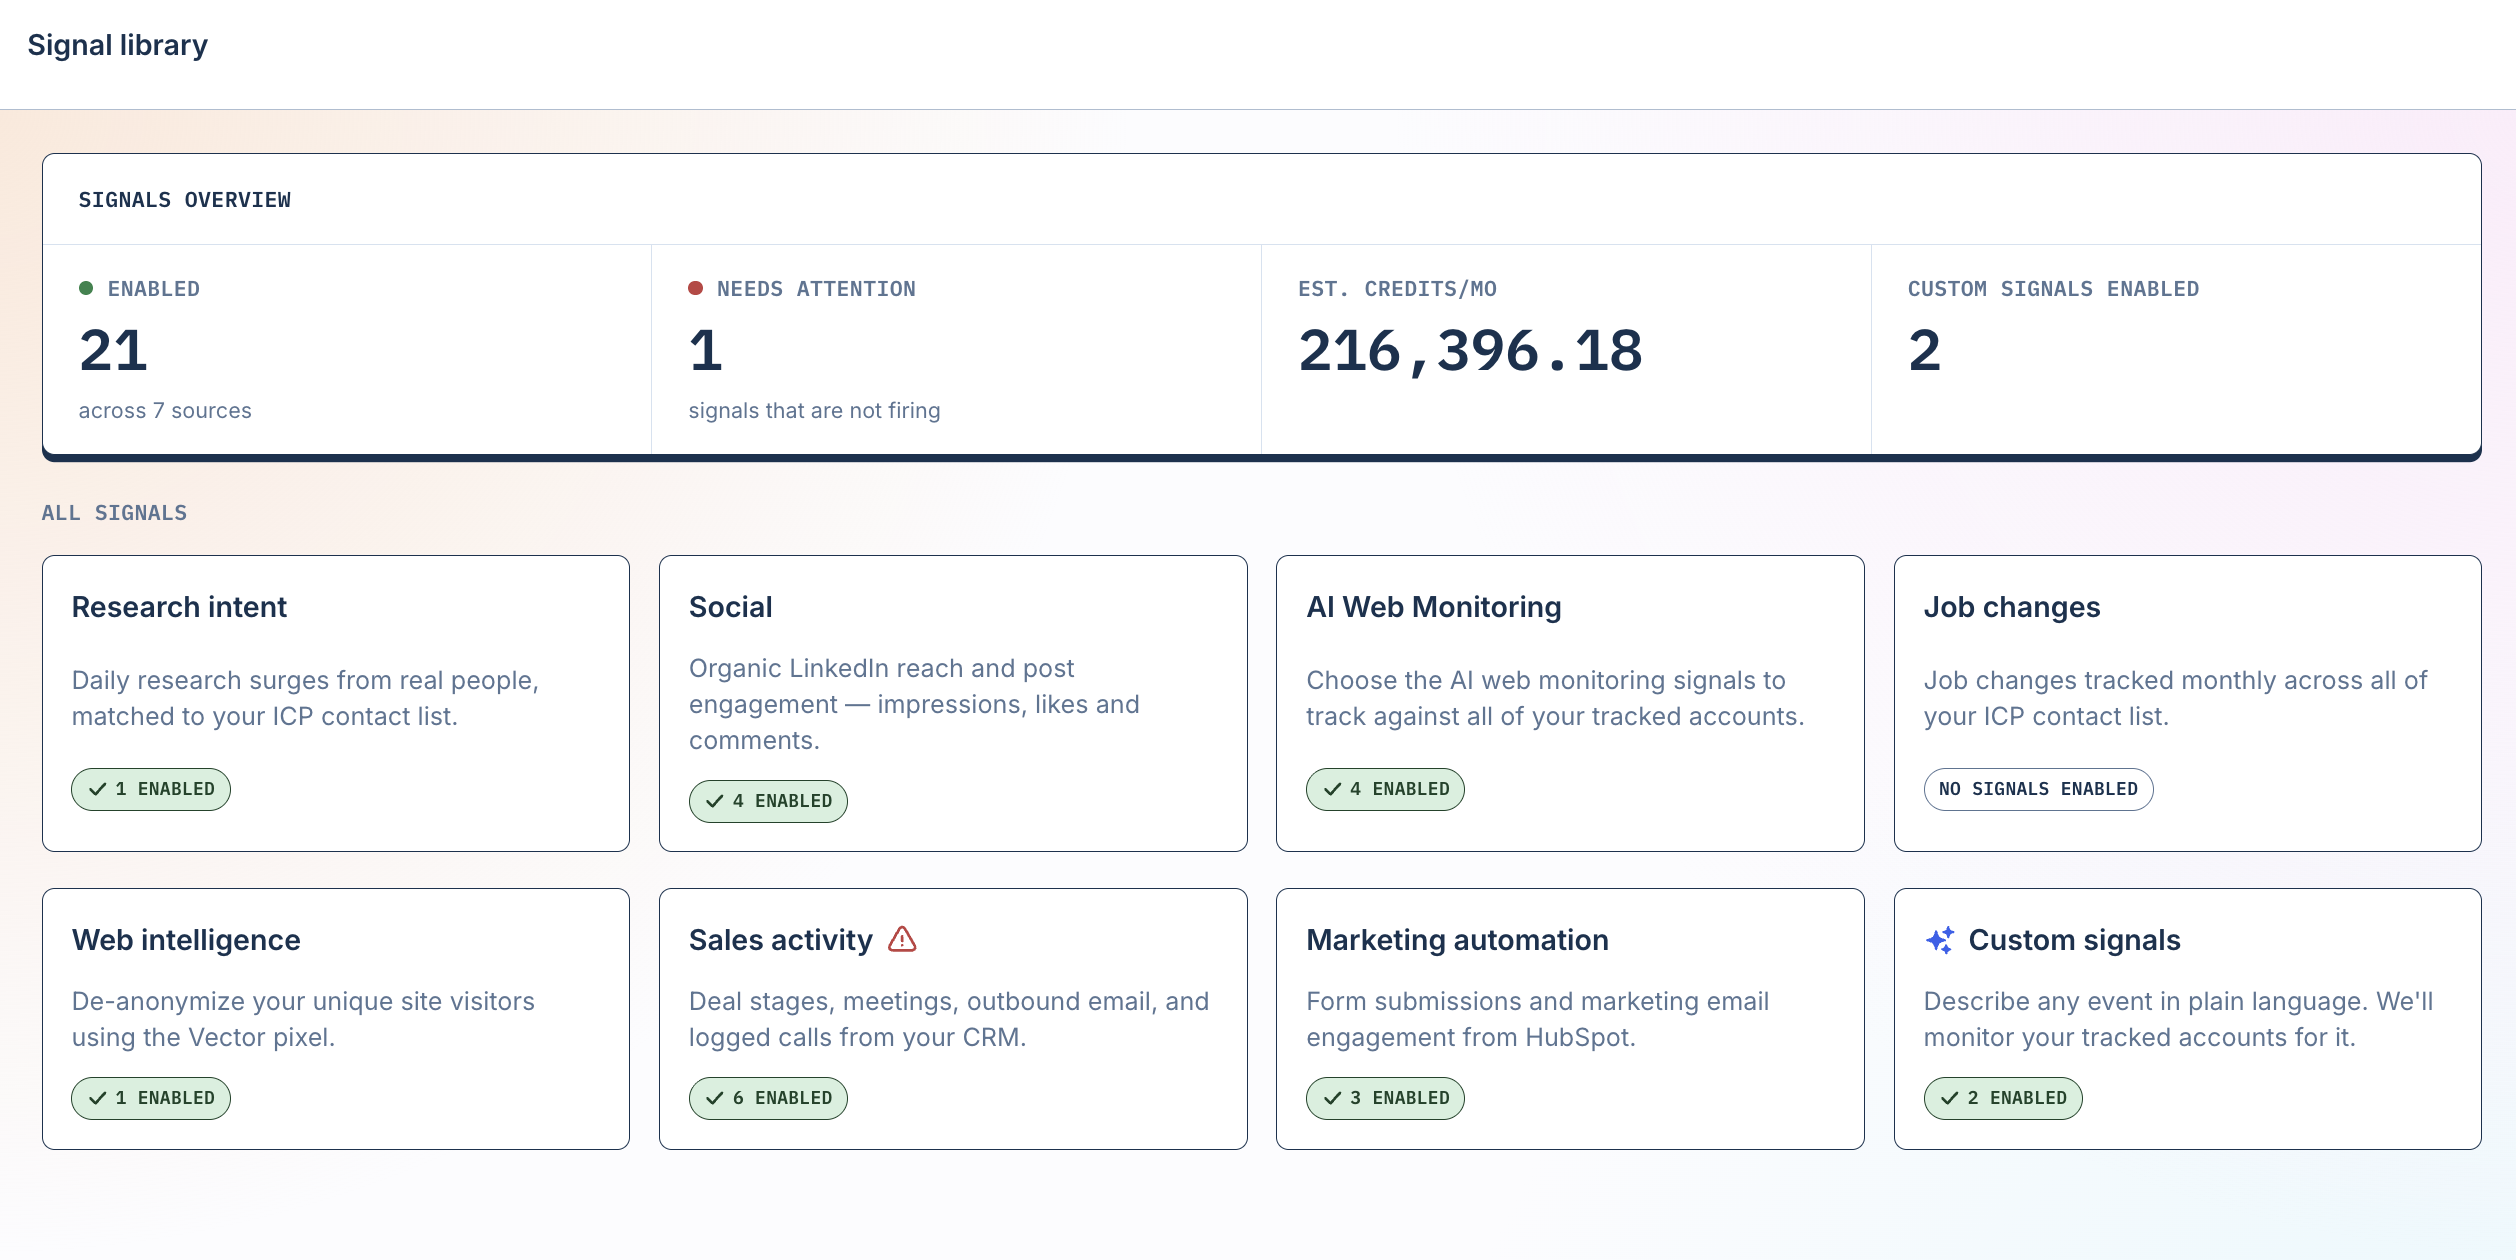
The Signal Library shows the signals available to your organization and their current status.
Depending on the signal, you may see:
Whether the signal is enabled
Whether its required integration is connected
Any setup that needs attention
Applicable credit or usage information
Additional configuration options
Use the toggle next to a signal to enable or disable it.
Good to know: Enabling a signal controls whether Vector uses that signal for your organization. It does not disconnect or change the underlying integration.
Signal types
Signals are organized by the type of activity they capture.
Research Intent
Research Intent identifies research activity related to topics your buyers care about.
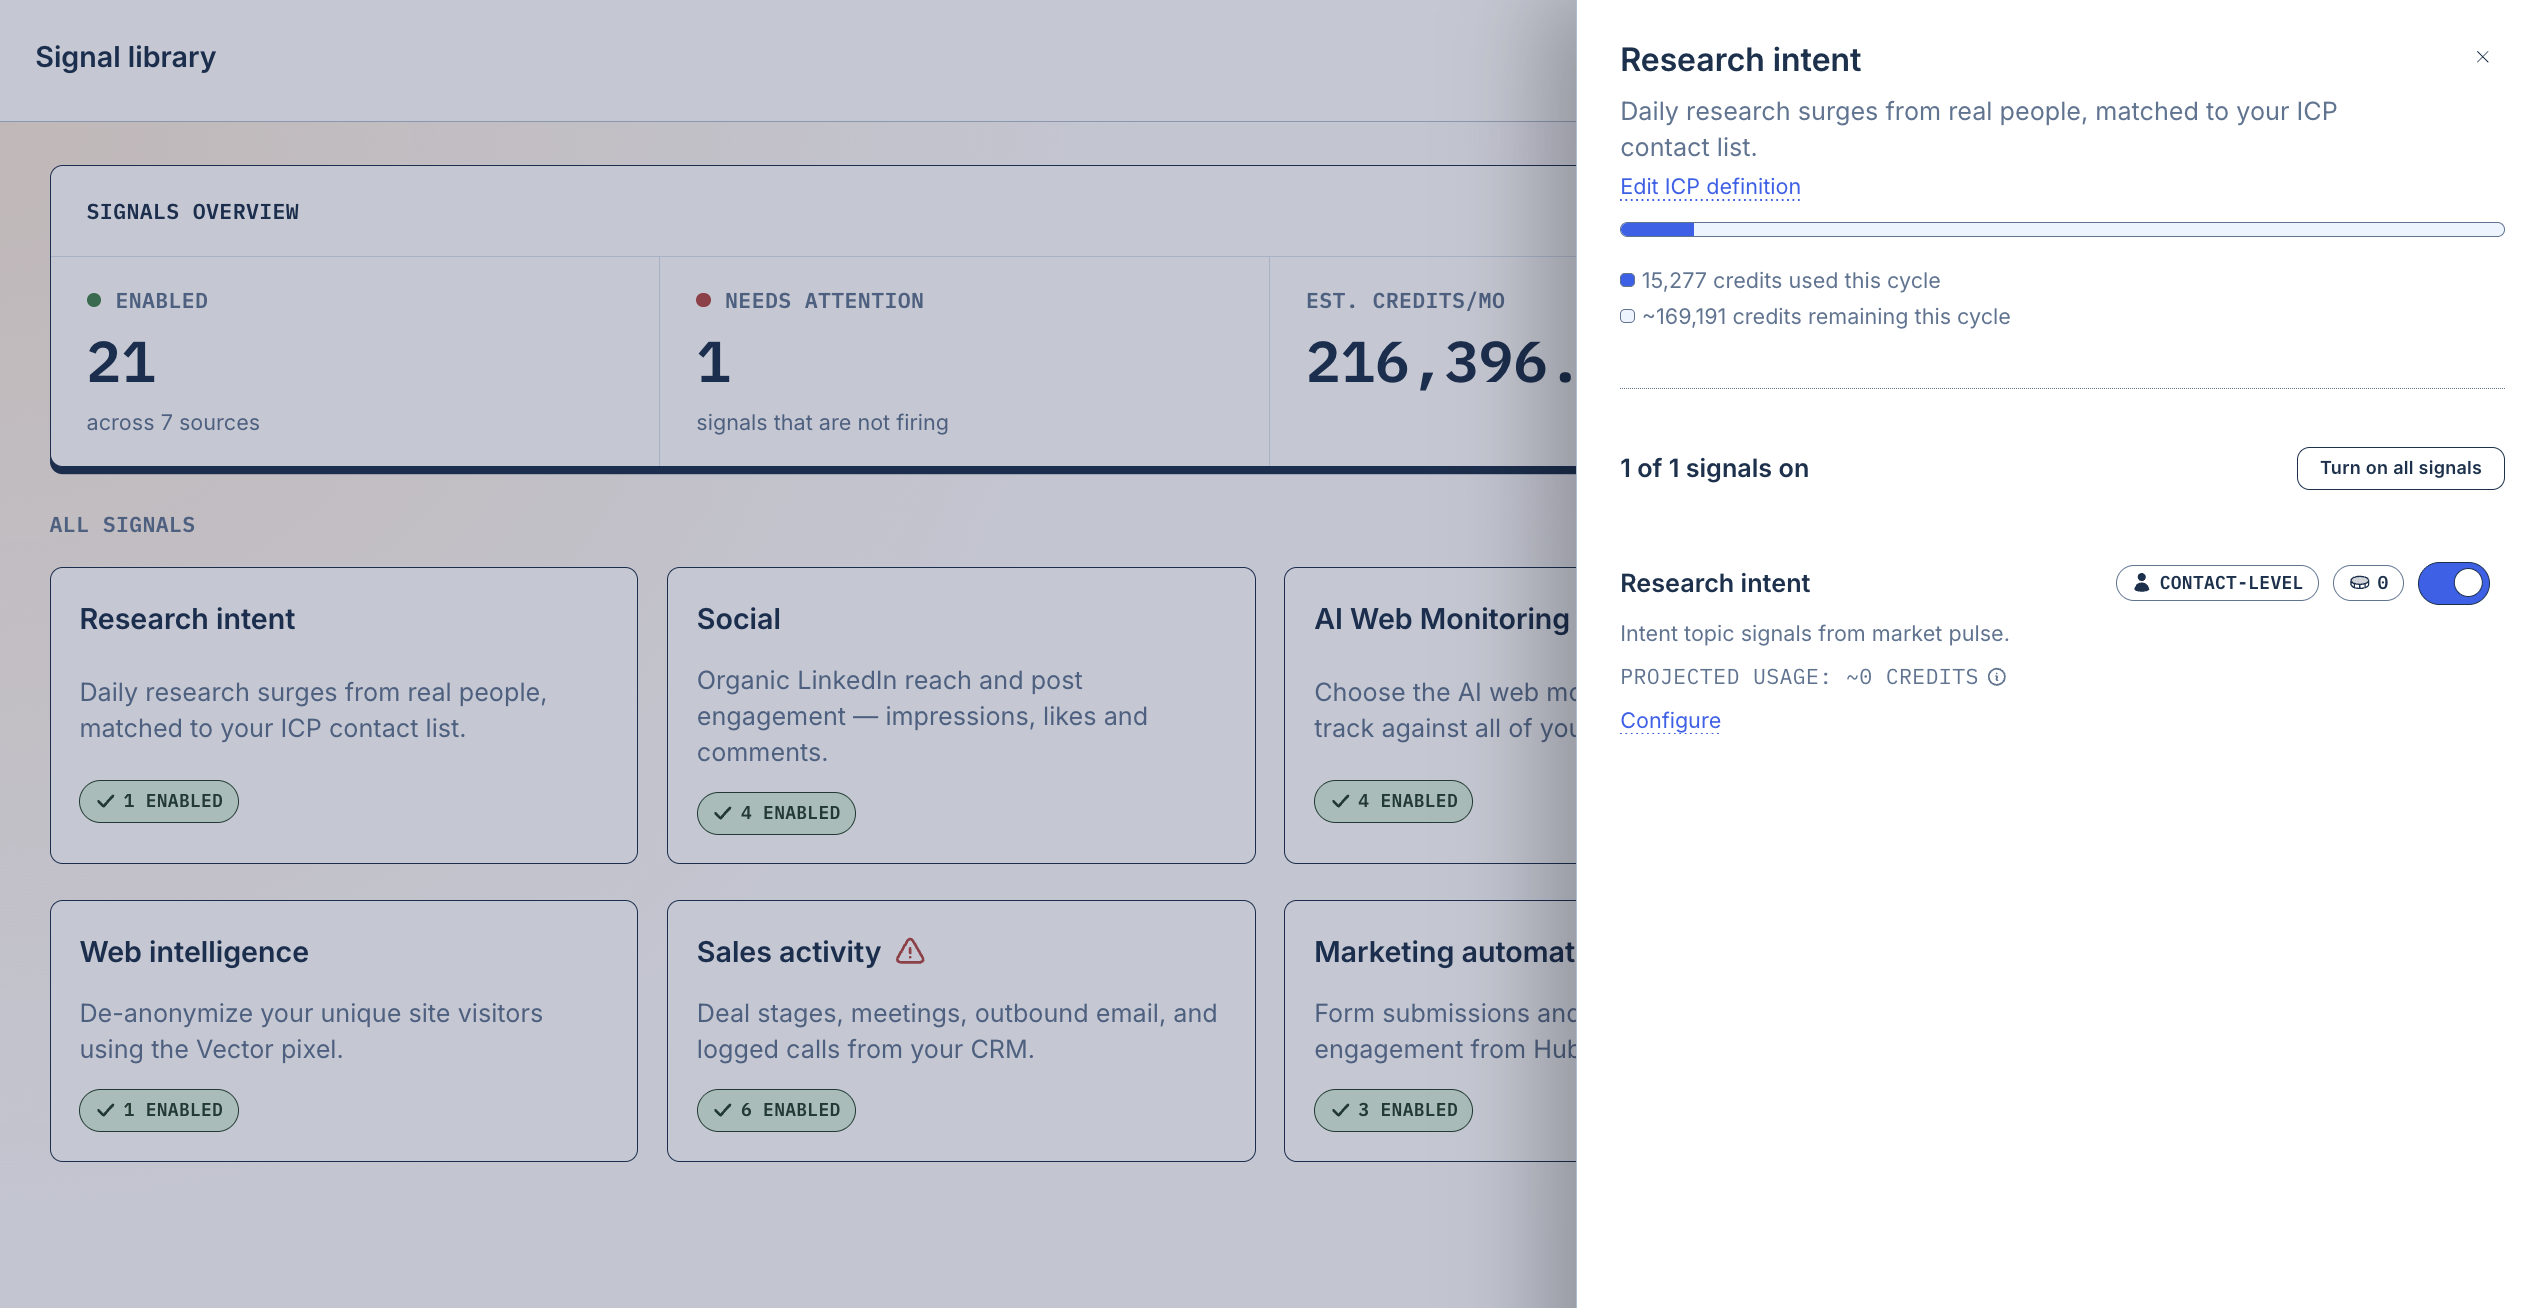
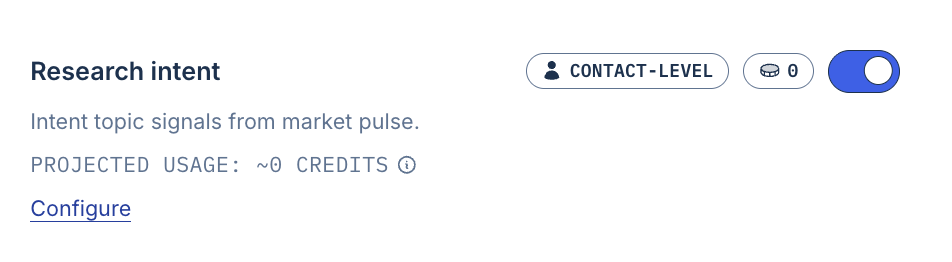
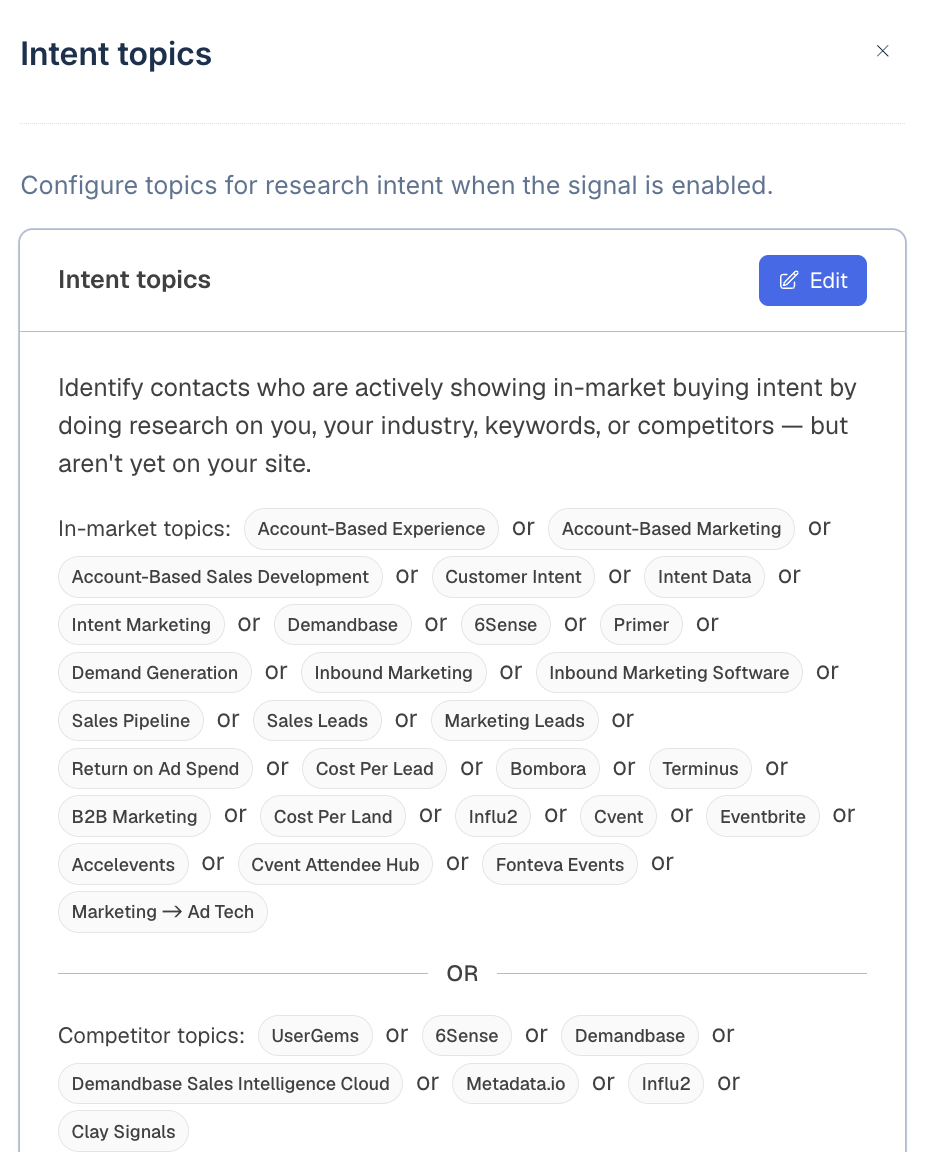
Before Research Intent begins flowing, you'll configure the topics you want Vector to monitor.
Depending on your setup, you can:
Open Research Intent from the Signal Library.
Select Configure. Review or add your intent topics.
Choose the scope you want Vector to monitor.
Enable the signal.
Request historical activity, if needed.
Choose your intent topics
Research Intent only produces activity for topics that have been accepted for your organization.
Use topics that represent meaningful areas of research for your buyers rather than broad categories that may generate a large amount of irrelevant activity.
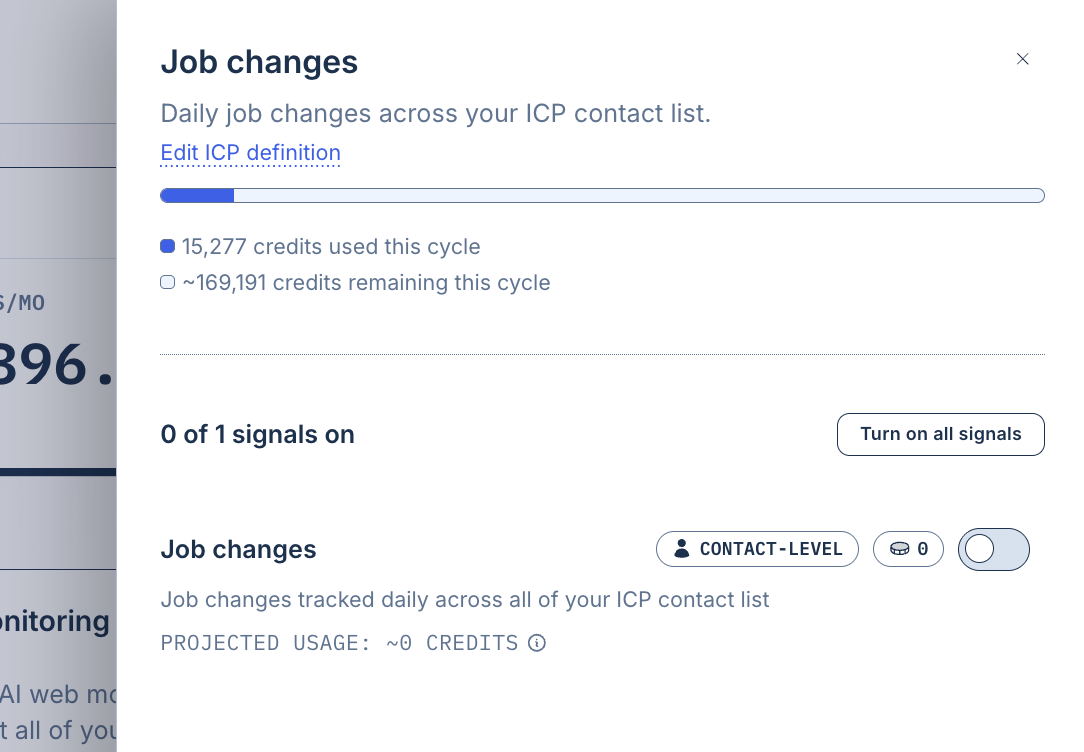
Job changes
Job-change signals help you identify meaningful movement among people who matter to your buying process.
Available signals can include:
New hires
Promotions
Departures
Champion movement
Web intelligence
Web intelligence captures relevant activity and changes from web sources.
For your own website, this can include activity such as website pageviews captured through the Vector pixel.
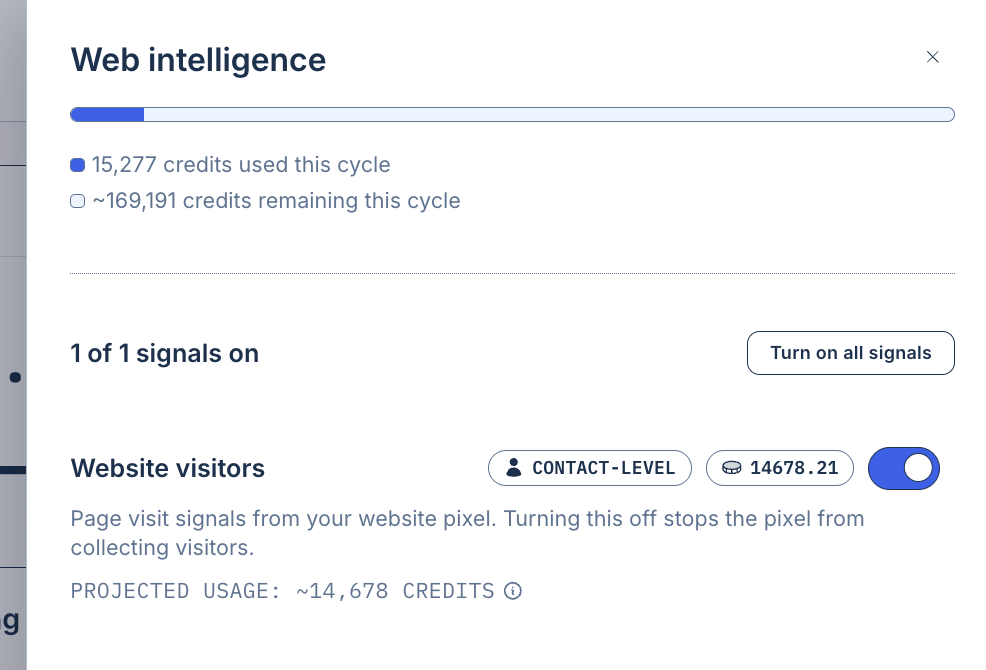
If a web signal requires additional setup — such as installing the Vector pixel — Vector will flag it in the Signal Library.
Related: Install and verify the Vector pixel
Sales activity
Sales activity signals use activity from your connected CRM to understand what's happening between your team and buyers.
Depending on your CRM and configuration, signals may include:
Deal stage changes
Meetings booked or held
Outbound email activity and replies
Logged calls
Other CRM activity
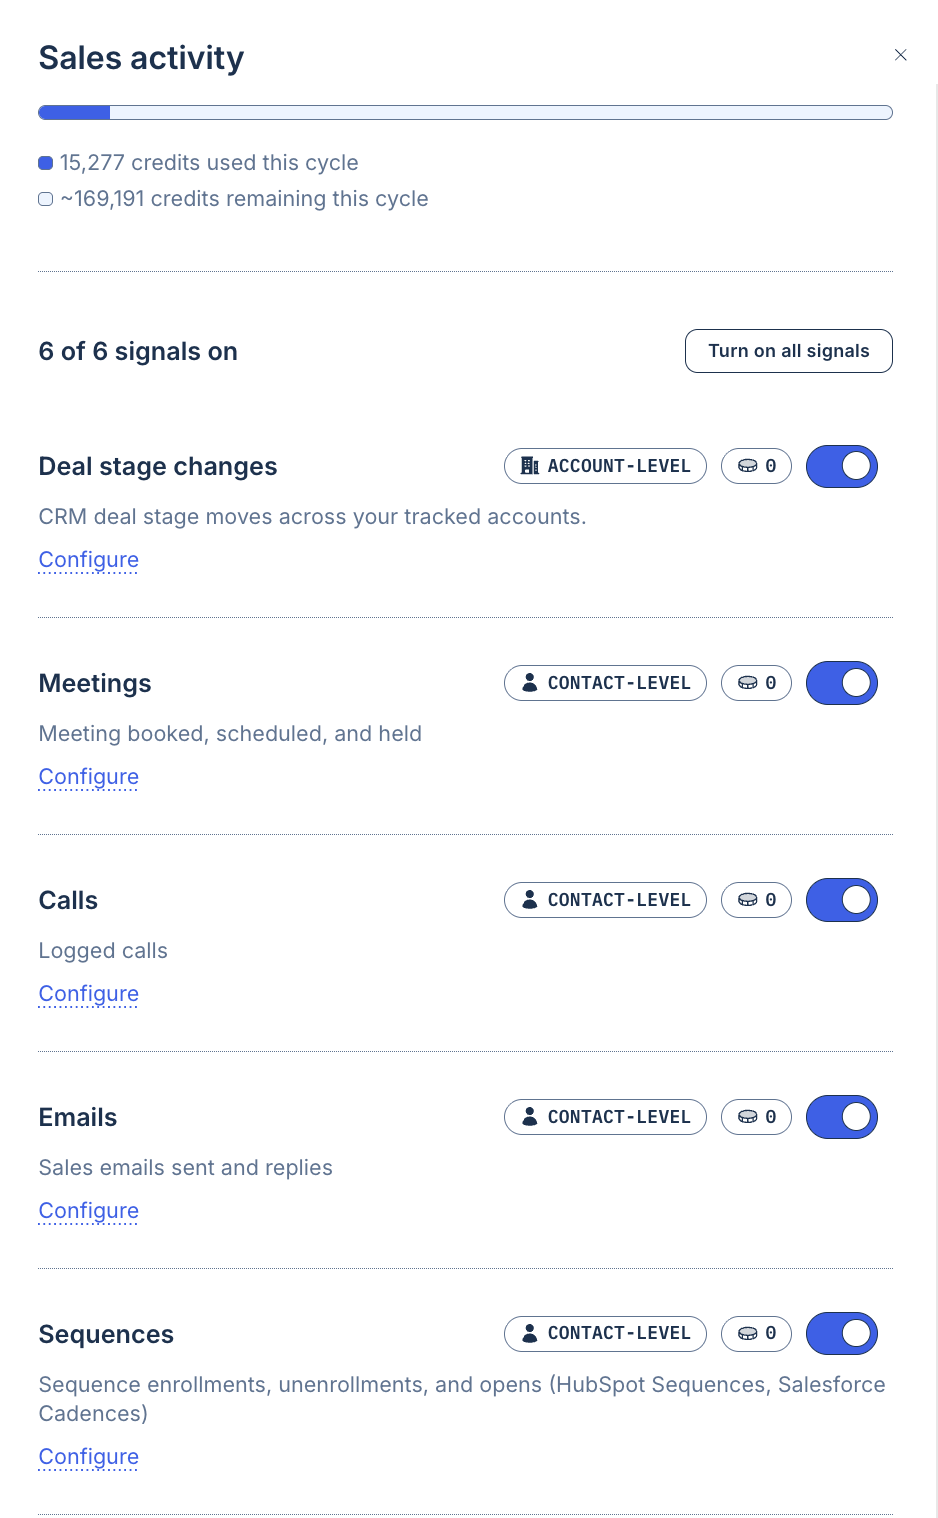
If these signals aren't flowing, first confirm that your CRM integration is connected and syncing successfully.
Related: Connect HubSpot to Vector / Connect Salesforce to Vector
Marketing automation
Marketing automation signals capture engagement from your connected marketing platform.
Available activity can include:
Marketing email sends
Email opens
Email clicks
Form submissions
Marketing event activity
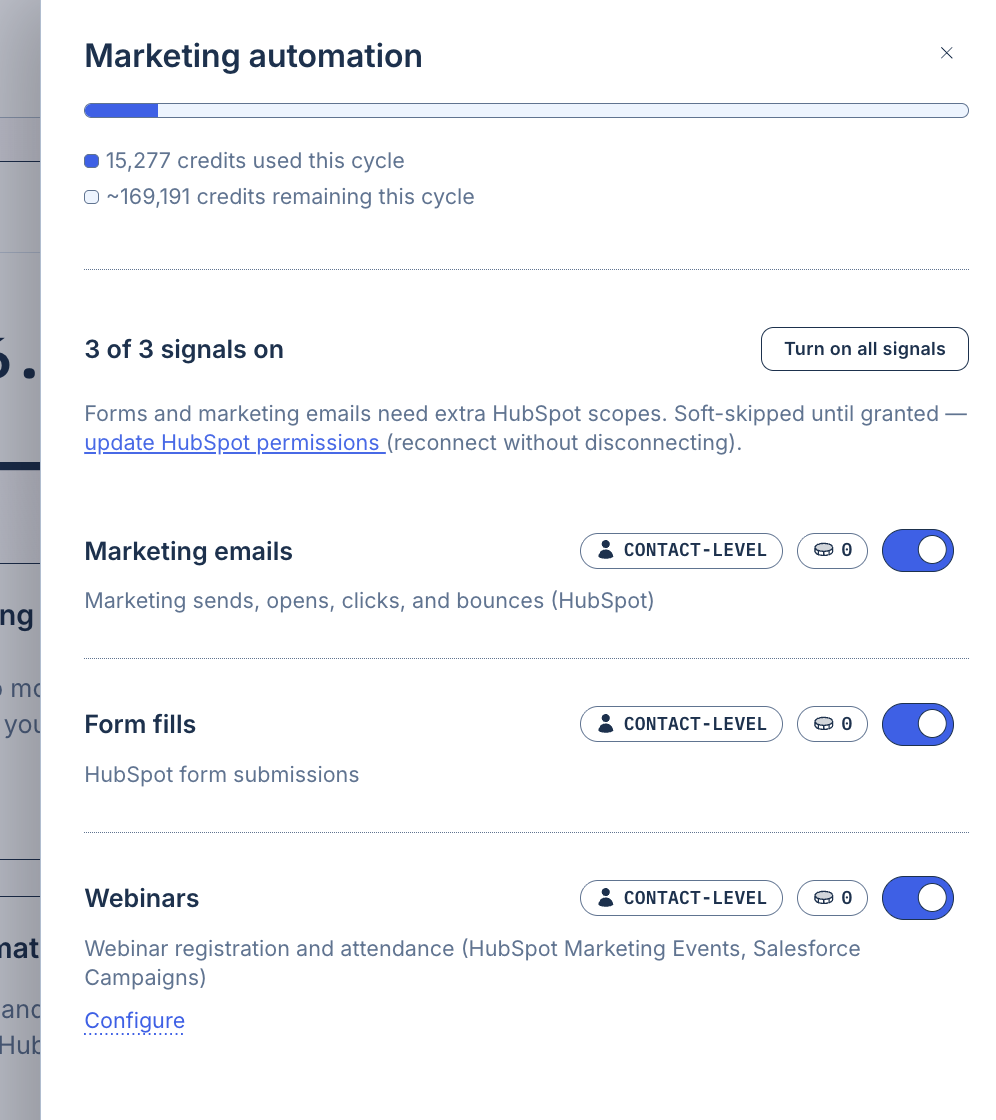
The activity available to Vector depends on your connected platform and the permissions enabled for that integration.
For example, HubSpot marketing activity must be enabled and the applicable marketing permissions approved before those events can flow into Vector.
Company and AI-powered signals
Vector can also monitor public sources for meaningful company-level events.
Depending on what's available in your Signal Library, built-in presets can include activity such as:
Raised funding
Acquisition activity
Earnings report
Major company news
Each of these presets uses 1 credit per detected event.
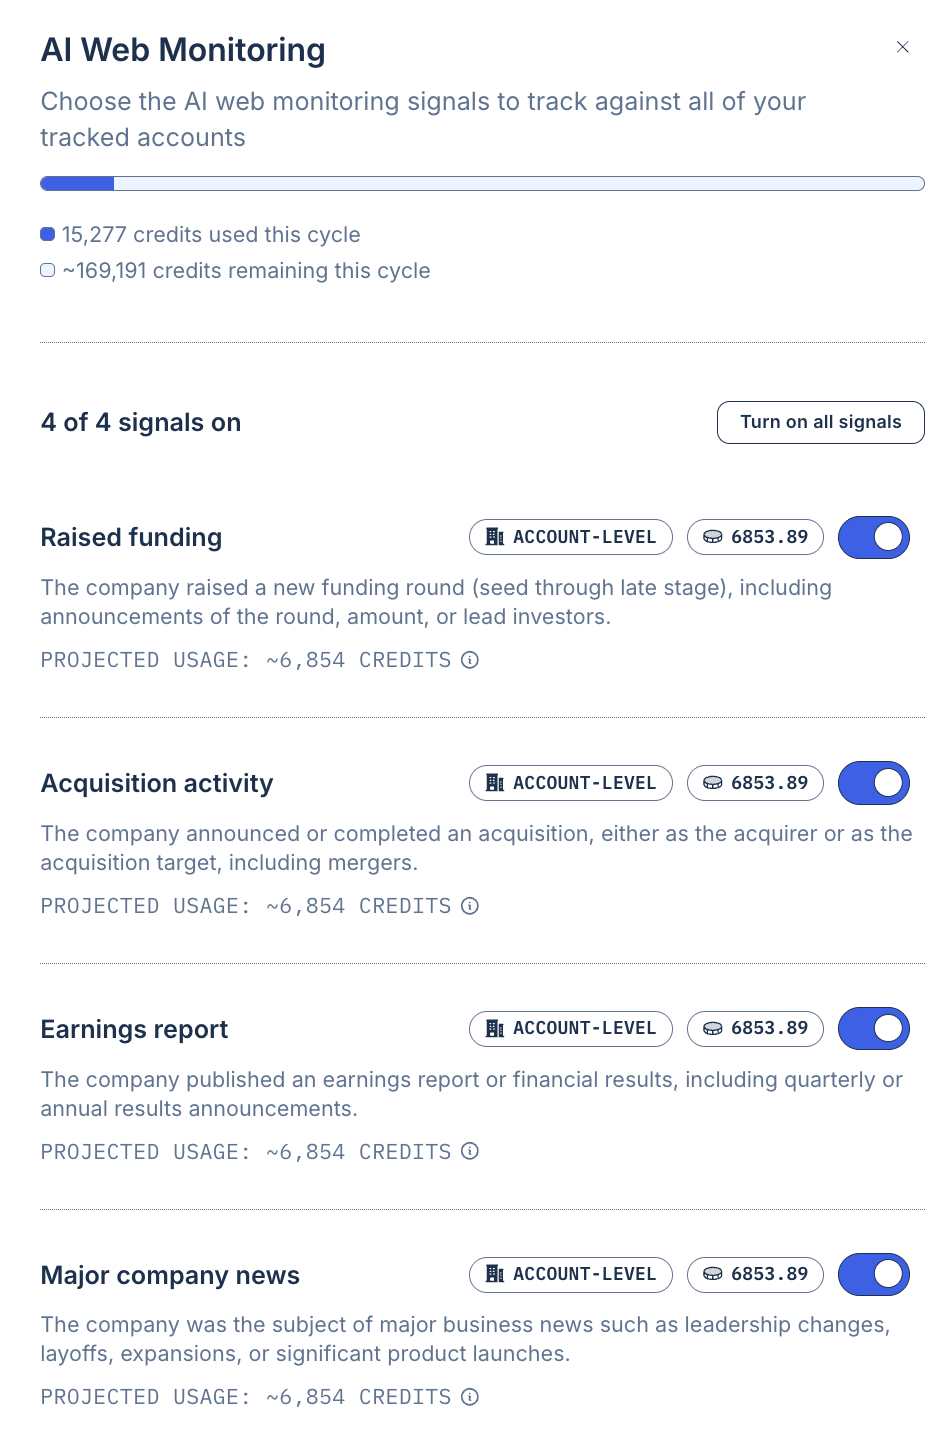
Some of these signals run on a recurring schedule. Where applicable, Vector shows information about frequency and estimated usage directly in the signal configuration.
Beyond these built-in presets, you can create custom signals to monitor other company-level activity meaningful to your buying motion for example, press mentions, hiring activity, or social brand and topic mentions.
Create a custom signal
Custom signals let you monitor for events that are specific to your business or buying motion.
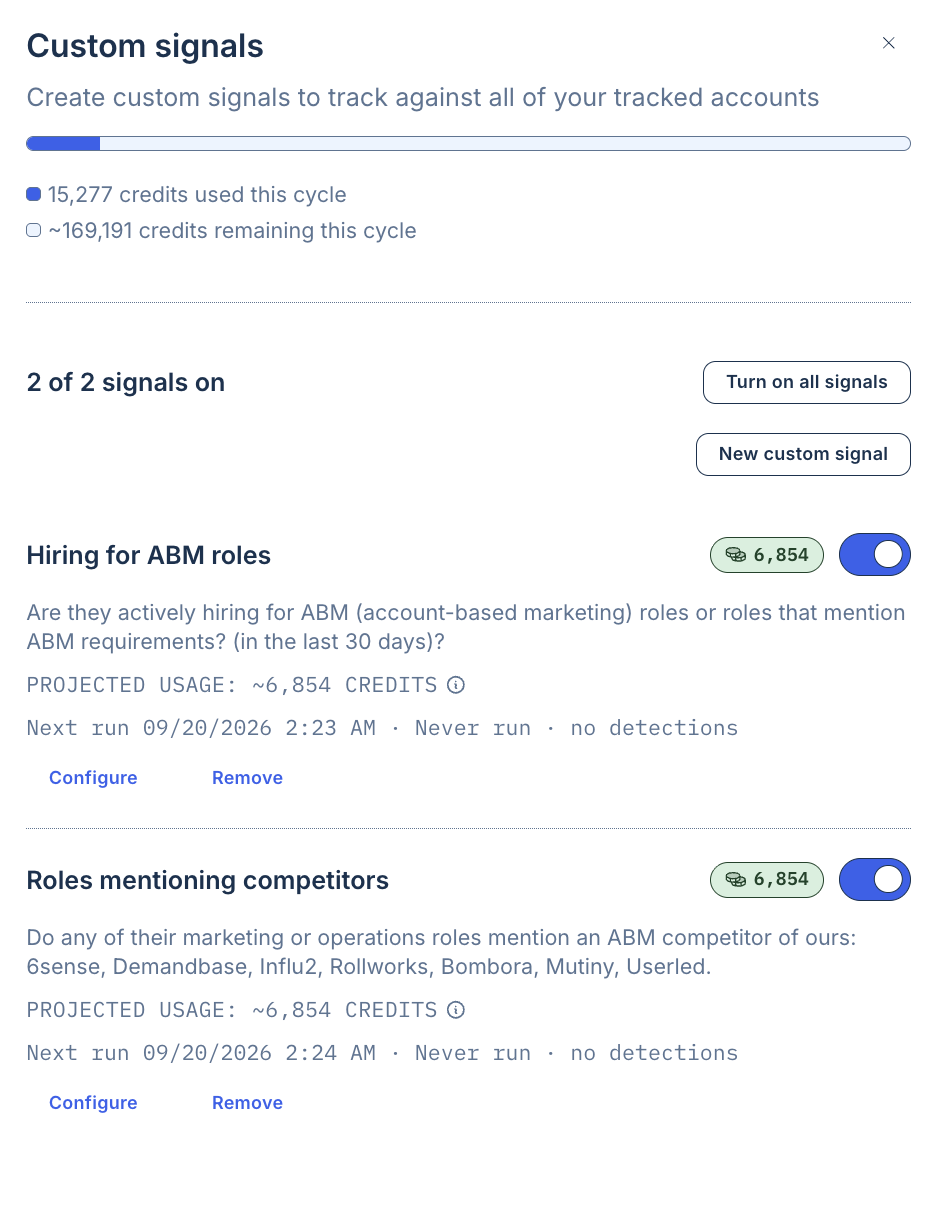
To create one:
Open Custom signals in the Signal Library.
Select New custom signal.
Describe the event you want Vector to monitor.
Configure the signal.
Enable it when you're ready to begin monitoring.
For example, you might create a signal for a specific company change that matters to your ICP or a behavior that is particularly meaningful in your sales process.
Understand signal status
A signal's status tells you whether Vector can currently use it.
You may see states such as:
On
The signal is enabled and its required setup is available.
Off
The signal is currently disabled.
Not connected
The backing integration or pixel for this signal is down.
Needs attention (not firing)
The signal is enabled, but something required for it to operate is missing, so it isn't currently firing.
That could mean:
An integration needs to be connected or reauthorized
The Vector pixel needs to be installed
Personas need to be configured
Research Intent topics need to be accepted
Additional signal configuration is required
Open the affected signal to see what action is needed, or check inline warnings for reconnect links. An overview stat also shows how many signals are in a "Needs attention" state across your Signal Library.
Understand signal credits and usage
Where applicable, Vector shows credit or usage information directly in the Signal Library.
Depending on the signal, you may see:
A per-signal price
Estimated monthly usage
The number of accounts included
How frequently Vector checks for the signal
Some signals may have no additional credit cost.
Good to know: Actual usage depends on the signal, its scope, the number of accounts being monitored, and how that signal is configured.
Enable or disable a signal
To change a signal:
Go to Signal Library.
Find the signal you want to manage.
Use the toggle to turn it on or off.
If additional configuration is required, open the signal drawer.
Complete the required setup and save your changes.
Disabling a signal stops Vector from using that signal for your organization. It does not disconnect the associated integration.
Where signals appear in Vector
The Signal Library controls what evidence Vector watches for, but the Signal Library isn't the only place you'll see that activity.
Signals can feed experiences including:
Account prioritization
Buying stages
Account journeys
Buying committee activity
Segments and activation, where supported
Account Stories
Pipeline Influence
This creates a connection between the activity Vector detects and the account experiences your team uses to understand and act on it.
Troubleshooting
A signal is enabled but no activity is appearing
Open the signal and confirm that all required configuration has been completed.
Depending on the signal, check that:
The required integration is connected
Research Intent topics have been accepted
The correct monitoring scope is selected
Required personas are configured
The Vector pixel is installed and working
My Research Intent signal isn't generating activity
Confirm that the signal is enabled and that at least one Research Intent topic has been accepted.
Also review which accounts are included in the signal's scope.
My LinkedIn signals show as not connected
LinkedIn signals depend on two separate integrations:
LinkedIn Ads — backs LinkedIn paid ad impressions and organic impressions.
LinkedIn Community — backs LinkedIn post reactions and LinkedIn comments.
Check which signal is showing as not connected, then confirm that the corresponding integration is connected to Vector. You do not need to reconnect the other integration simply to turn individual LinkedIn signals on or off.
I just enabled a signal. Can I see historical activity?
Historical availability for signal types can vary.