Scoring Vector Triggers in Hubspot Marketing Hub
Last updated: September 15, 2026
This guide outlines how to set up contact-level scoring in HubSpot using Vector’s event data within Marketing Hub. By integrating site visitor and intent data, you can create an automated lead scoring system to prioritize high-intent prospects based on their engagement with your website or off-site intent signals.
September 16th, 2026 Update: Signal Library & HubSpot Scoring
With the September 16 launch of Vector's new Signal Library, Signal Library signals are not currently available for direct scoring in HubSpot.
Existing field mappings and custom values configured through Segment creation will continue to apply and can be used within your existing HubSpot workflows.
We're continuing to expand how Signal Library data can be used downstream, so stay tuned for additional scoring capabilities and updates.
Create a New Score
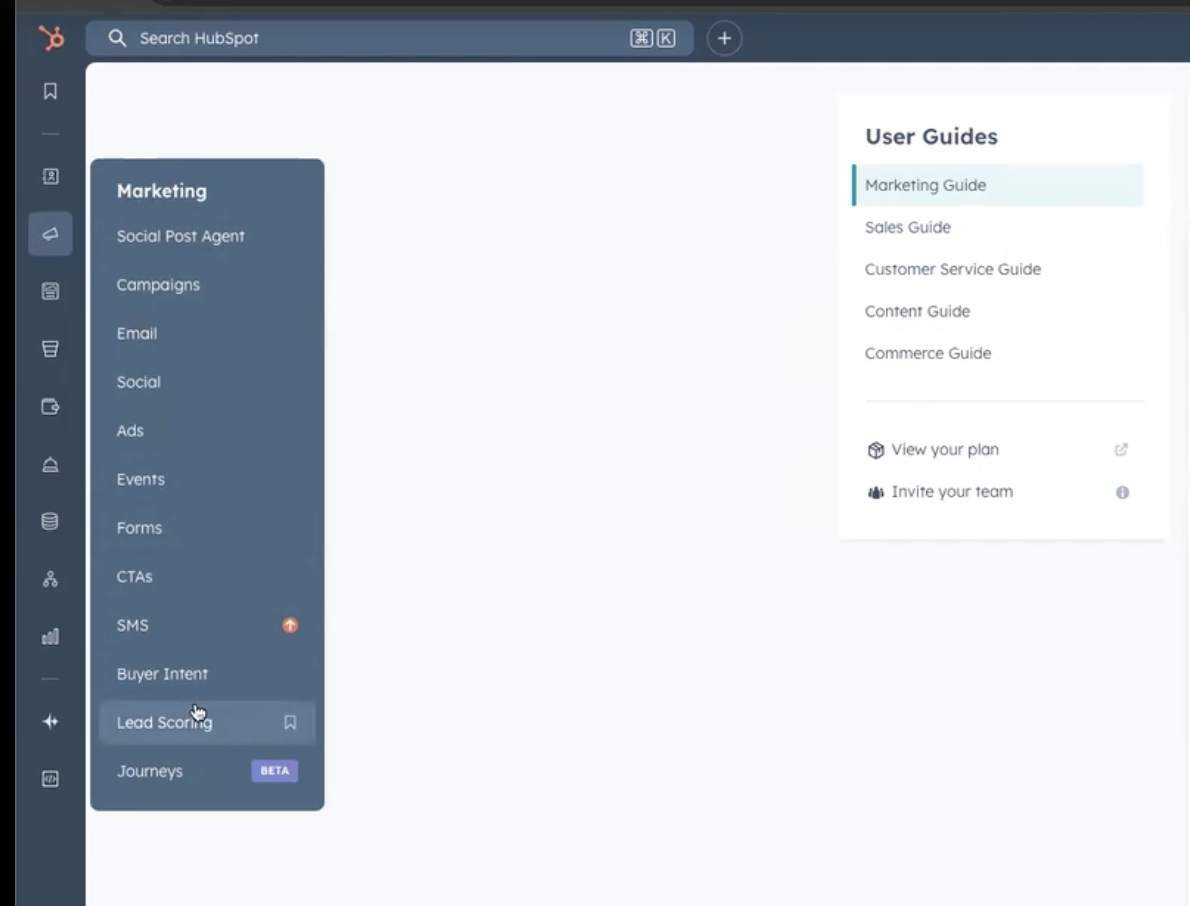
Go to Marketing → Lead Scoring
From the left navigation, open Marketing and select Lead Scoring.
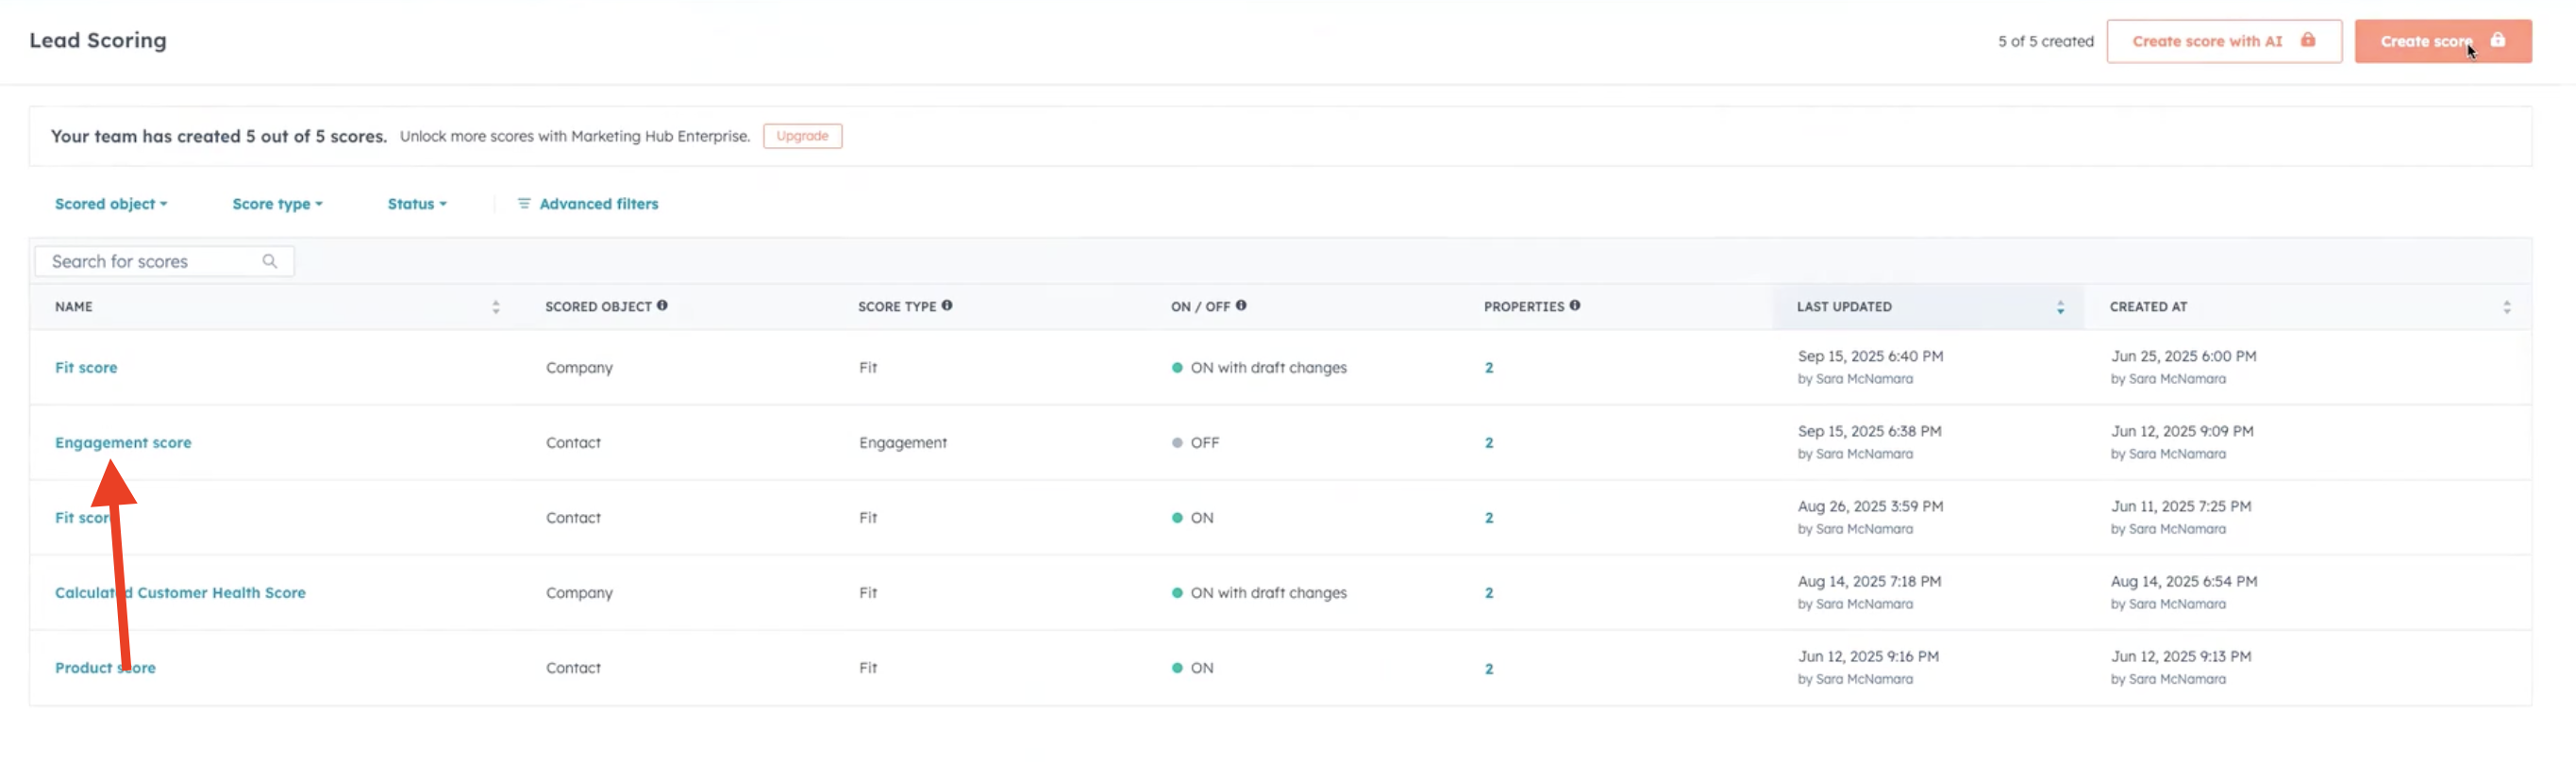
Click Create Score
Select Create Score to start a new model.
Note: If you don’t see this option, you may have already used all available slots. Contact your admin or support to request additional scoring models.

Choose Engagement Score Type
Make sure to select Engagement as the score type. Other score types will not work for this setup.
Add Events to Your Score
Click Add Event
You can add multiple events to contribute to your score.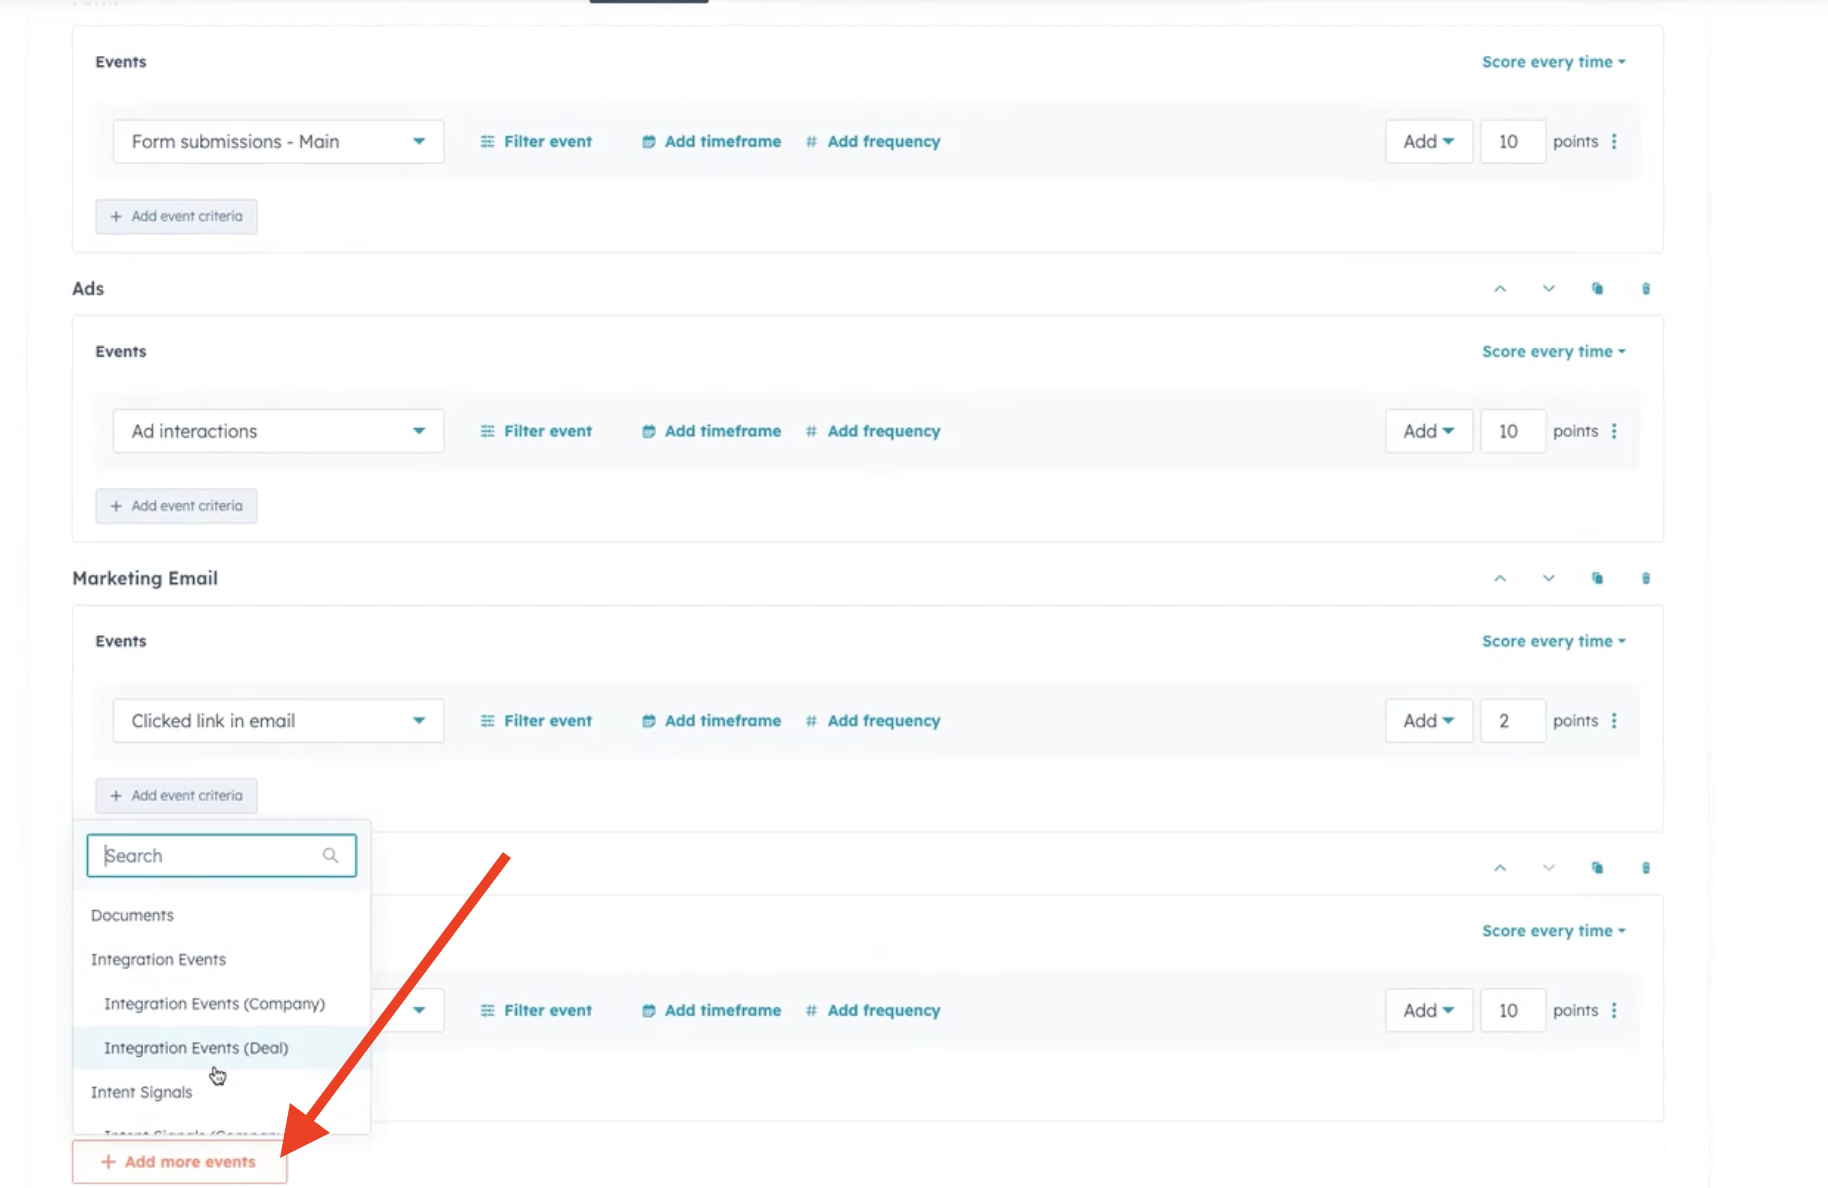
Select Event Type
For company-level scoring, choose Integration Event → Company Visit Timeline.
For contact-level scoring, choose Custom Event → Vector Site Visitor Webhook.
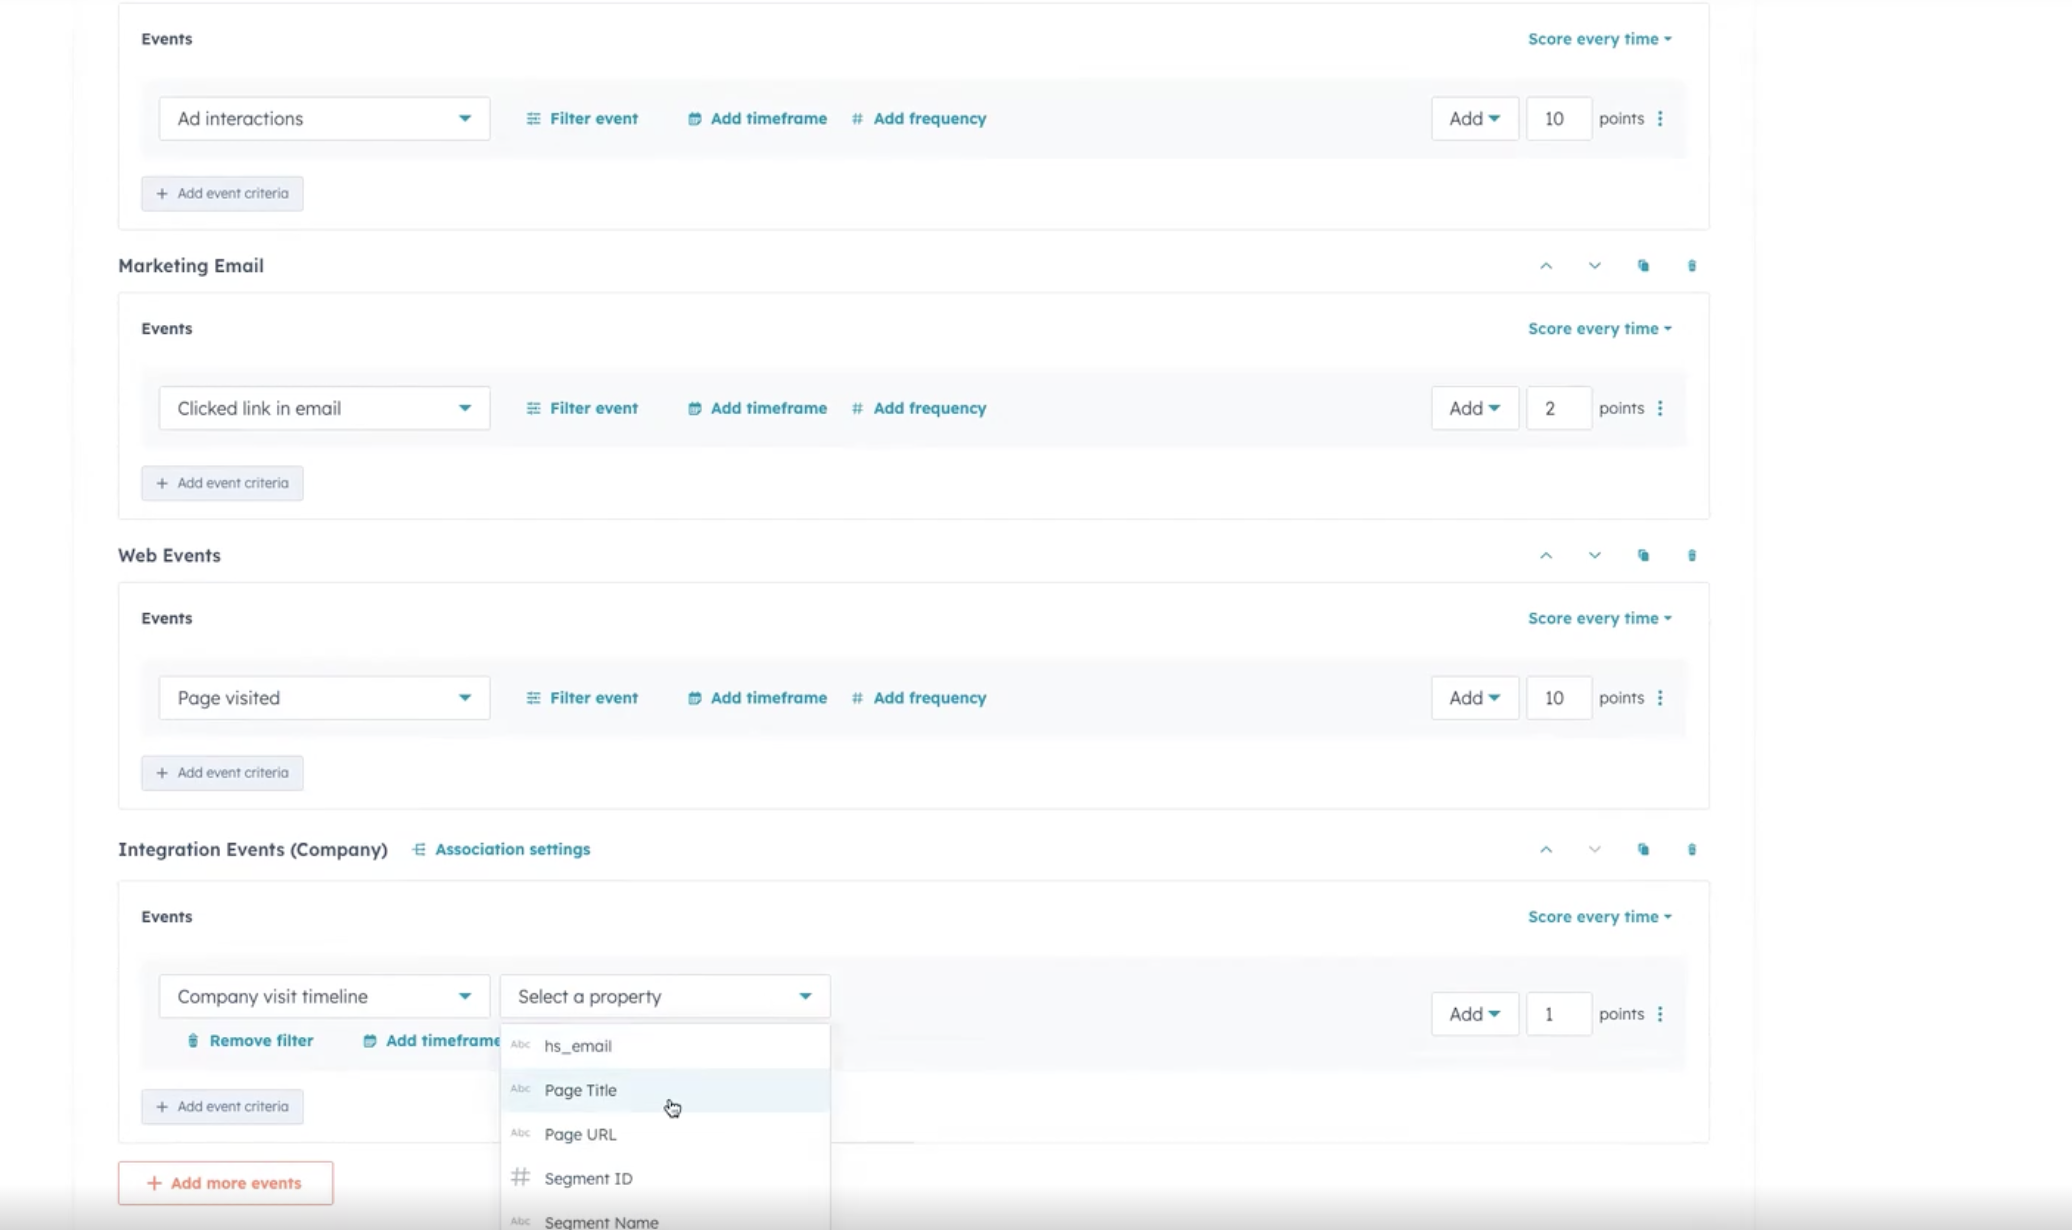
Apply Filters (Optional)
Narrow down events by adding filters such as:Page URL
Segment ID (for specific Vector triggers)
Segment Name
Other custom attributes
Set Timeframe and Frequency
Define when and how often the event should count toward the score:Timeframe: e.g., “within the last 7 days.”
Frequency: “exactly X times” or “at least once.”
Assign Points
Use the right-hand panel to assign points to each event.
You can configure whether points apply every time the event occurs or set limits (e.g., “only above X” or “below Y”).
Review and Turn On
Once your score is configured:
Review the rules and point allocations.
Toggle the score on to begin evaluating leads and accounts.
Best Practices
Company vs. Contact Events: Use company visit timelines to capture account-level engagement, and contact-level custom events for individual activity.
Simple vs. Custom: In many cases, a straightforward engagement event (like company visits with a timeframe) works better than building a custom workaround.
A Note on Intent and Lead Scoring
Intent does not mean someone is ready to buy.
Vector activity can provide evidence that a contact or account is engaging with relevant topics or your brand, but it should be evaluated alongside fit, account context, other engagement, and your broader qualification criteria.
As of the September 16 release, Signal Library signals cannot yet be scored directly through this HubSpot setup. Continue using your existing Segment field mappings and custom values where appropriate.
More updates are coming as we expand how Signal Library data can be activated downstream.
Need help thinking through your HubSpot scoring strategy? Reach out to solutions@vector.co — we're glad to help!